New: Run AI anywhere your cloud runs
Learn more
Govern your AWS, Azure, GCP or VMware resources in under an hour — without migrating or disrupting anything.
Before you start, make sure you have admin access to the emma platform, read-only credentials (BYOA) for each cloud account you want to connect, and at least one Project Group already created in emma.
Open the emma platform and navigate to Project Groups. Create a new one or select an existing group. This is where your imported resources will live alongside any emma-provisioned infrastructure.
Inside the Project Group, go to Connected Accounts and click Add Account. Choose your provider (AWS, Azure, GCP or VMware) and enter your BYOA credentials. You can connect one account per provider per Project Group. emma uses read-only access — nothing in your cloud is modified.
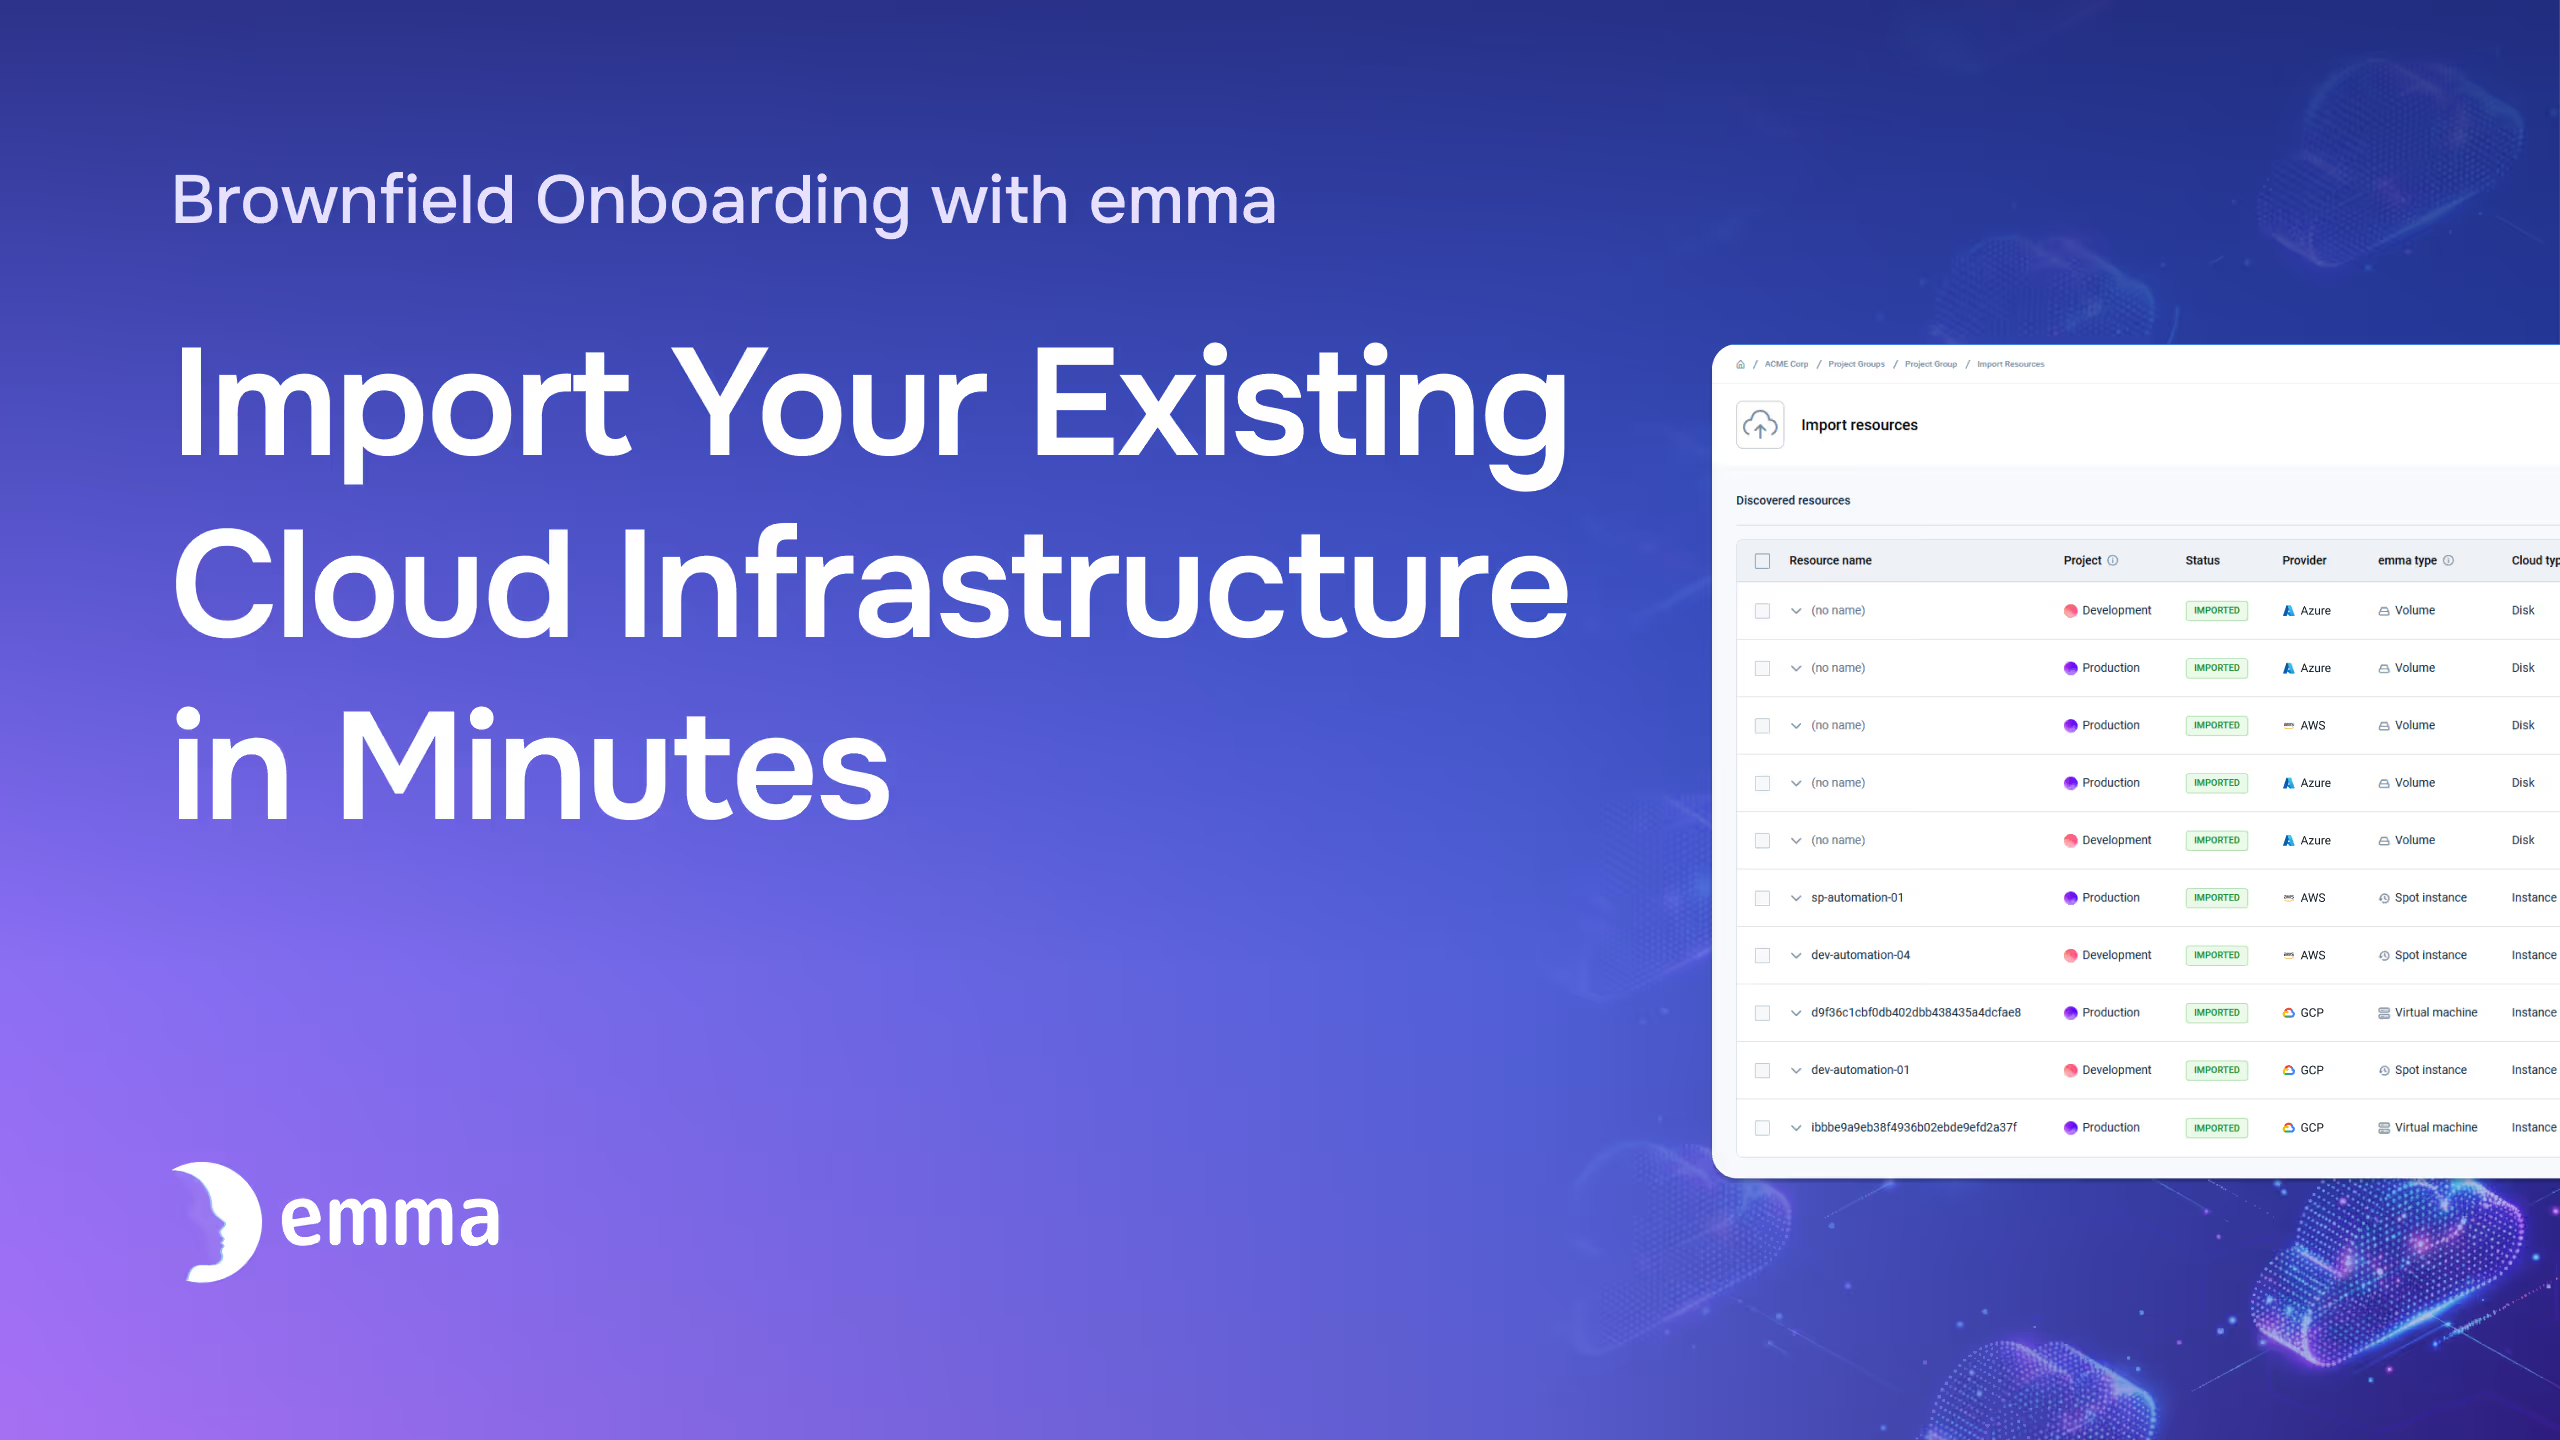
Once the account is connected, click Run Discovery. emma scans the connected account and builds a complete inventory of every resource — compute instances, Kubernetes clusters, storage, networking, and more. This typically takes a few minutes depending on the size of your estate.
Browse the full list of discovered resources. Nothing is auto-ingested. You see everything that exists in the account — along with metadata like resource type, region, and current status. Use this view to identify what should be governed and what can stay outside your perimeter for now.
Choose which resources to import and assign each one to a specific project within your Project Group. Each resource maps to exactly one project, keeping your governance structure clean. You can import everything at once or start with a subset — it's your call.
Schedule recurring Discovery Jobs to catch new or changed resources. emma flags anything that exists in your connected accounts but isn't mapped to a project — so orphaned infrastructure, shadow IT, and ungoverned resources surface automatically instead of hiding until your next manual audit.
Imported resources now appear in your emma dashboard alongside any emma-provisioned infrastructure. Monitor costs, enforce policies, and manage access from a single interface across all your clouds.
Disconnecting a BYOA account removes resources from emma's view but never deletes anything in your cloud. You can reconnect the same account at any time. The entire process is non-destructive — you can evaluate emma against your real infrastructure at zero risk.