client_id, client_secret)We won’t cover the Terraform installation steps here, but you can follow any standard Terraform installation guide for your OS.
In the next steps, we’ll generate the client_id and client_secret required for Terraform to authenticate with emma.
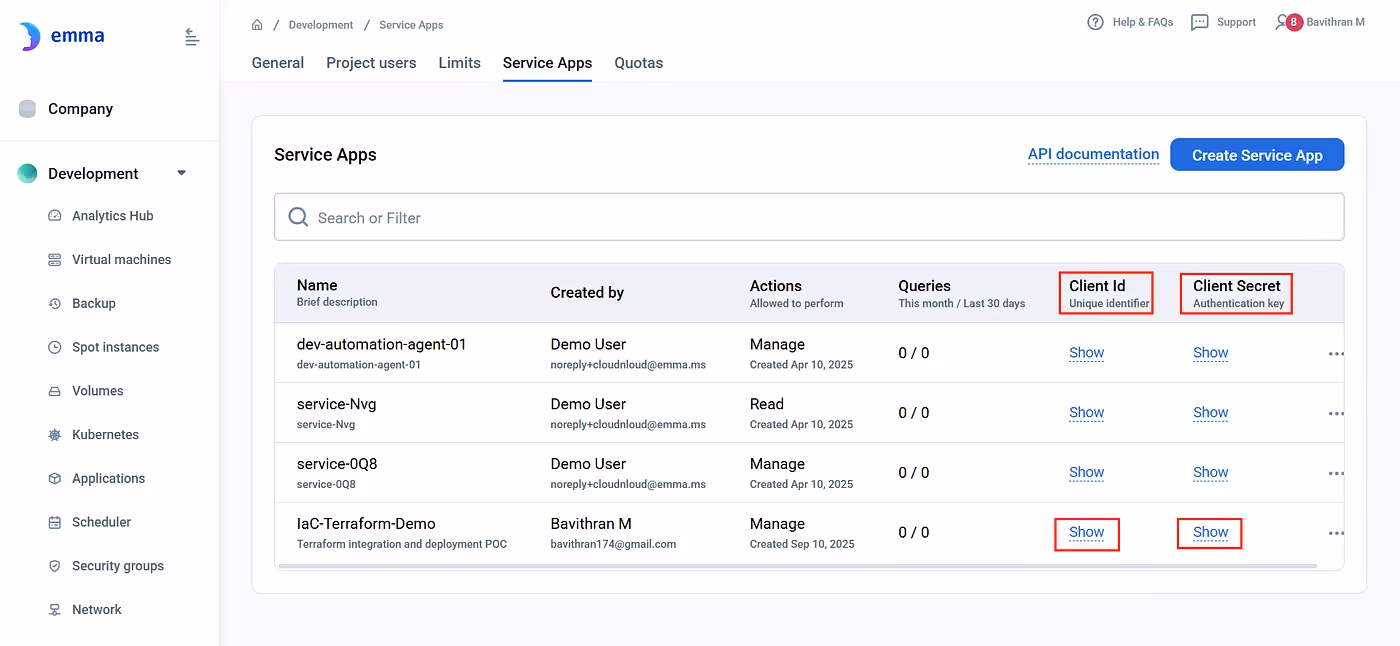
Terraform needs a way to authenticate against the emma API. In emma, this is done using a Service App, which gives you client_id and client_secret.
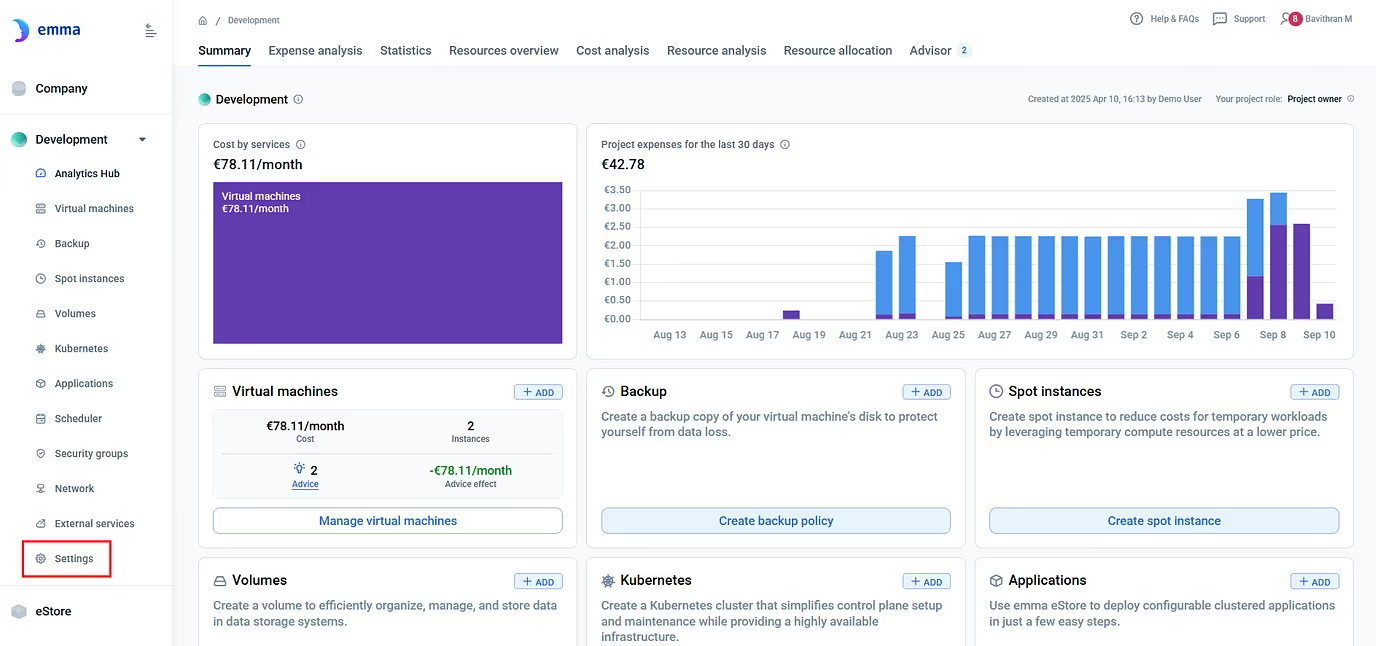
2. Go to Settings in the side menu, under the Project.
3. Click on Service Apps from the top menu.
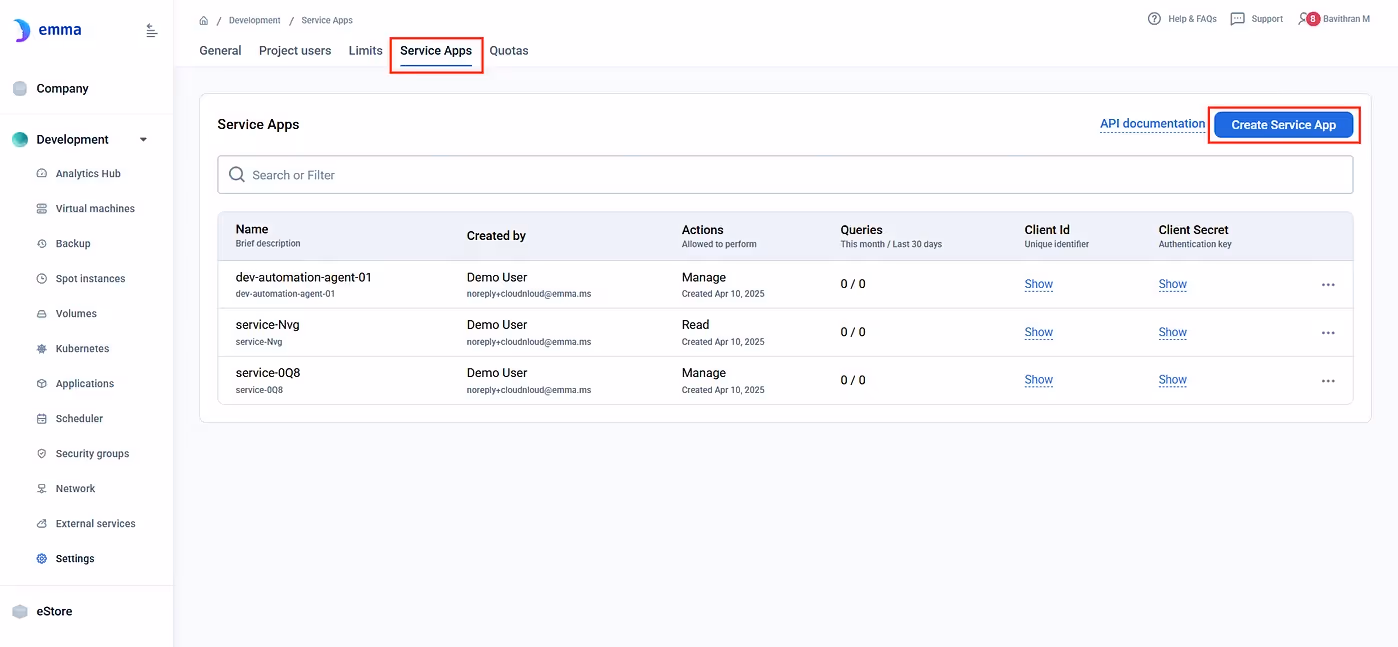
4. Create a new Service App. Choose the level of access:
Click on Save to create a new Service App.
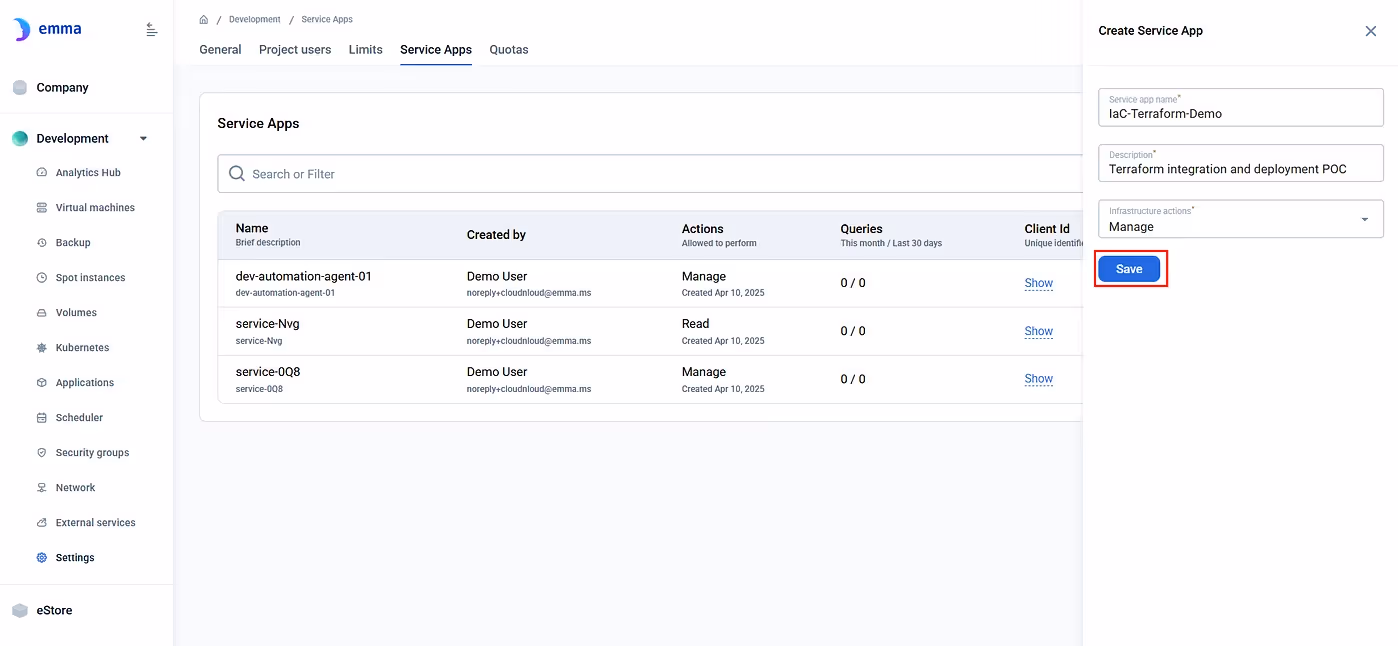
5. Once it’s created, click Show to reveal your:
You'll use these in Terraform.
Terraform manages infrastructure using .tf files for describing your infrastructure as code.
emma/
├─ main.tf
├─ providers.tf
├─ variables.tf
├─ outputs.tf
└─ terraform.tfvars # ⚠️ contains secrets (don’t commit)
# ----------------------
# Data sources
# ----------------------
data "emma_data_center" "aws" {
  name          = "eu-north-1"
  provider_name = "Amazon EC2"
}

data "emma_operating_system" "ubuntu" {
  type         = "Ubuntu"
  architecture = "x86-64"
  version      = "20.04"
}

# ----------------------
# Security Group
# ----------------------
resource "emma_security_group" "security_group" {
  name = "example"

  rules = [
    {
      direction = "INBOUND"
      protocol  = "all"
      ports     = "8080"
      ip_range  = "8.8.8.8/32"
    },
    {
      direction = "INBOUND"
      protocol  = "all"
      ports     = "8080"
      ip_range  = "4.4.4.4/32"
    }
  ]
}

# ----------------------
# SSH Key
# ----------------------
resource "emma_ssh_key" "ssh_key" {
  name     = "example"
  key_type = "RSA"
  # Optionally, load public key from file
  # public_key = file("~/.ssh/id_rsa.pub")
}

# ----------------------
# VM
# ----------------------
resource "emma_vm" "vm" {
  name               = var.vm_name
  data_center_id     = data.emma_data_center.aws.id
  os_id              = data.emma_operating_system.ubuntu.id
  cloud_network_type = "multi-cloud"
  vcpu_type          = "shared"
  vcpu               = 2
  ram_gb             = 1
  volume_type        = "ssd"
  volume_gb          = 8
  security_group_id  = emma_security_group.security_group.id
  ssh_key_id         = emma_ssh_key.ssh_key.id
}

# ----------------------
# Outputs
# ----------------------
output "vm_id" {
  value       = emma_vm.vm.id
  description = "ID of the created VM"
}

# Uncomment if provider exposes these attributes:
# output "public_ip" {
#   value       = emma_vm.vm.public_ip
#   description = "Public IP of the VM"
# }
The main.tf file defines all infrastructure pieces:
terraform {
  required_version = ">= 1.5.0"

  required_providers {
    emma = {
      source  = "emma-community/emma"
      version = "0.1.0"
    }
  }
}

provider "emma" {
  client_id     = var.client_id
  client_secret = var.client_secret
}
This file tells Terraform:
variable "client_id" {
 description = "Client ID for Emma provider authentication"
 type = string
 sensitive = true
}
variable "client_secret" {
 description = "Client Secret for Emma provider authentication"
 type = string
 sensitive = true
}
variable "vm_name" {
 description = "Name of the VM to create"
 type = string
 default = "test"
}
sensitive = true hides values from CLI/UI; add tunables like vm_name.
client_id     = "YOUR-CLIENT-ID"
client_secret = "YOUR-CLIENT-SECRET"
vm_name = "emma-terrform-vm"
Terraform auto-loads terraform.tfvars; keep it local.
Use the Client id and secret of Service App created before.
Note:
It is not recommended to store secrets in local files. However, for testing environments, this can be acceptable.
Now that everything is set up:
Navigate to the Ubuntu machine
mkdir emma && cd emma
2. Now create the .tf files mentioned above using nano or vim editor

3. Now create the resource using Terraform commands
terraform init
This downloads the emma provider, sets up the working directory, and sets up the backend for storing state.
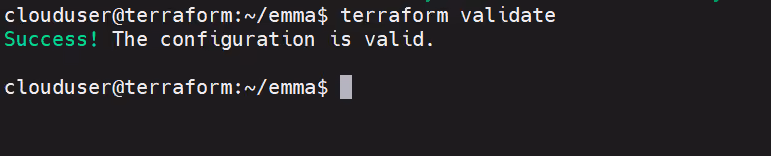
terraform validateChecks the syntax and configuration of your Terraform files to ensure they are valid.
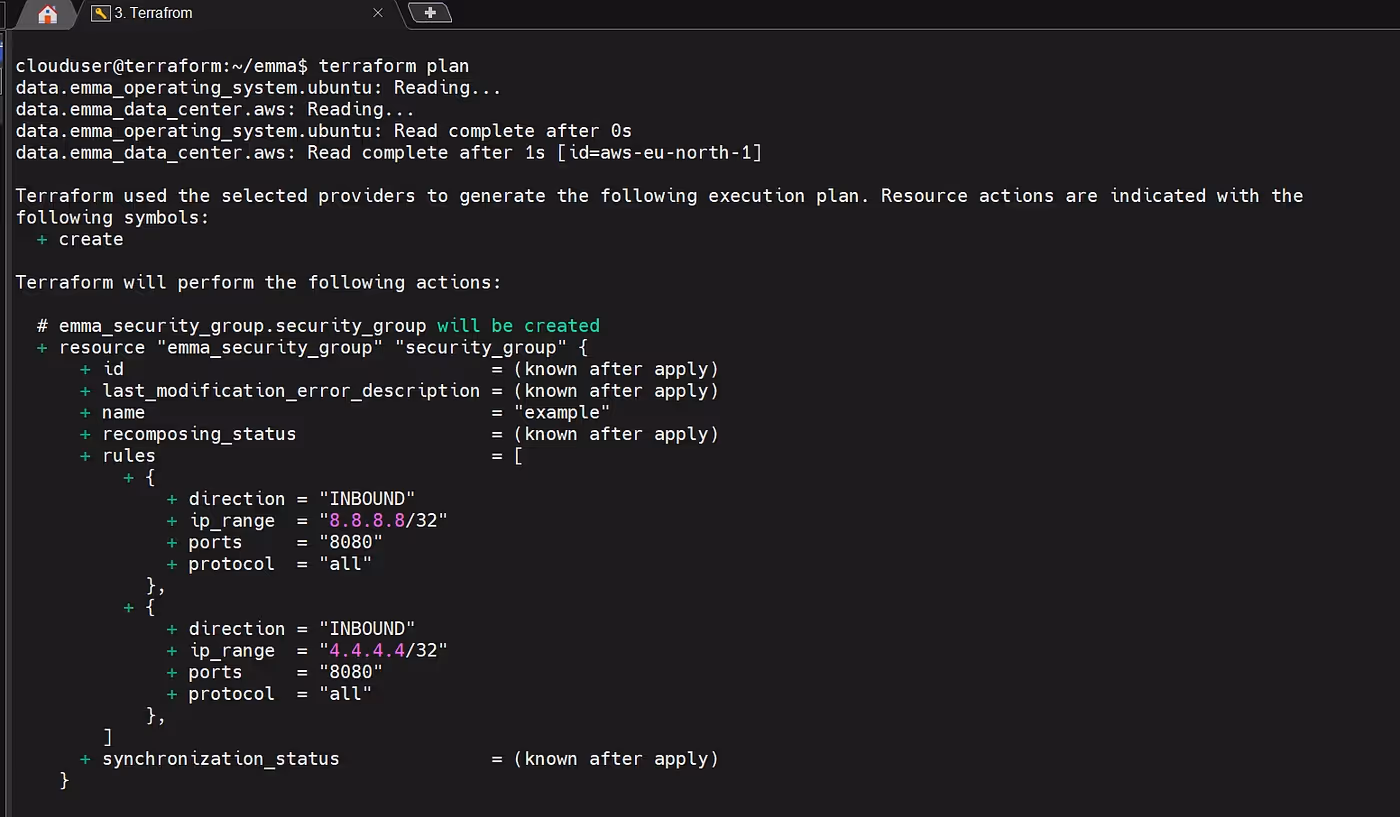
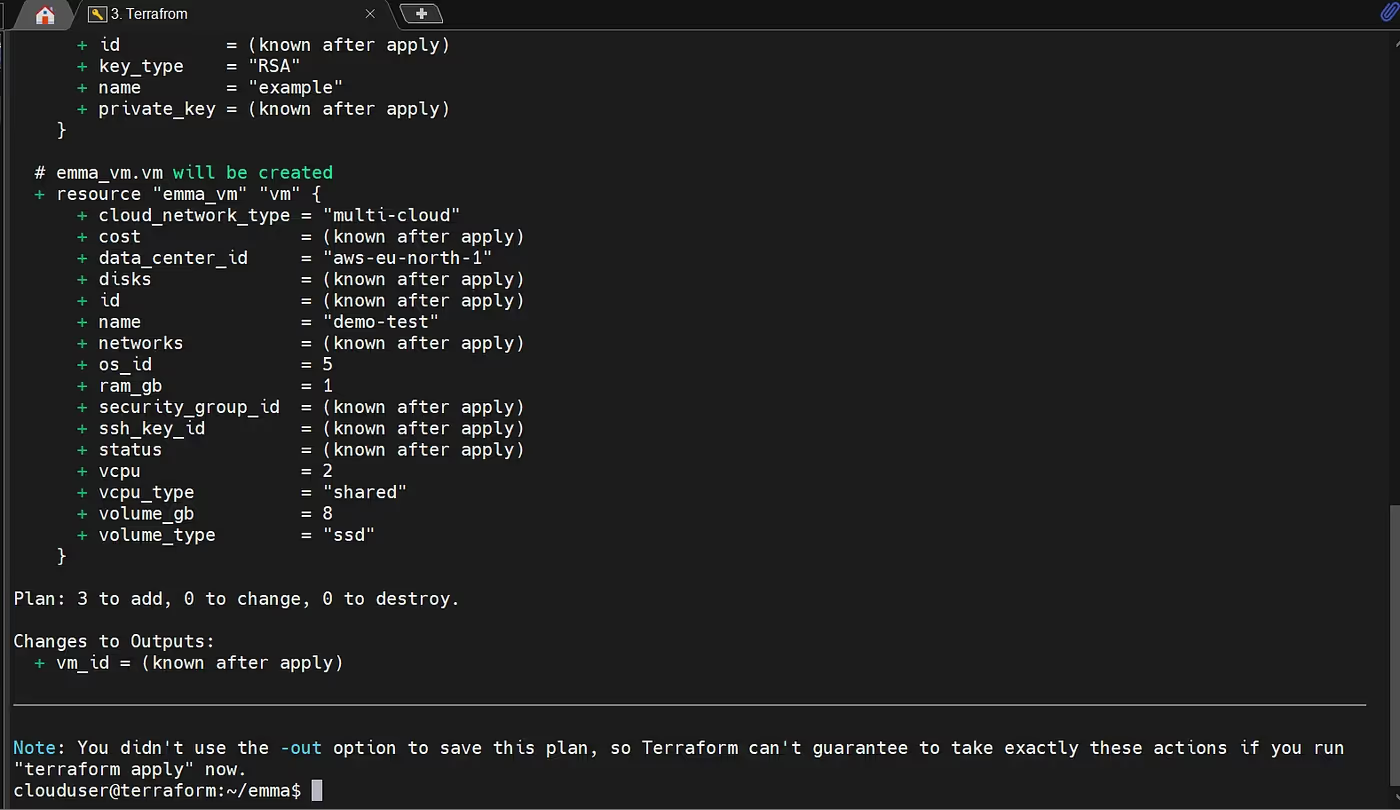
terraform planPrepares and shows the execution plan, detailing what Terraform will create, change, or destroy.
terraform applyExecutes the plan and applies the changes to provision/update infrastructure in the target cloud.
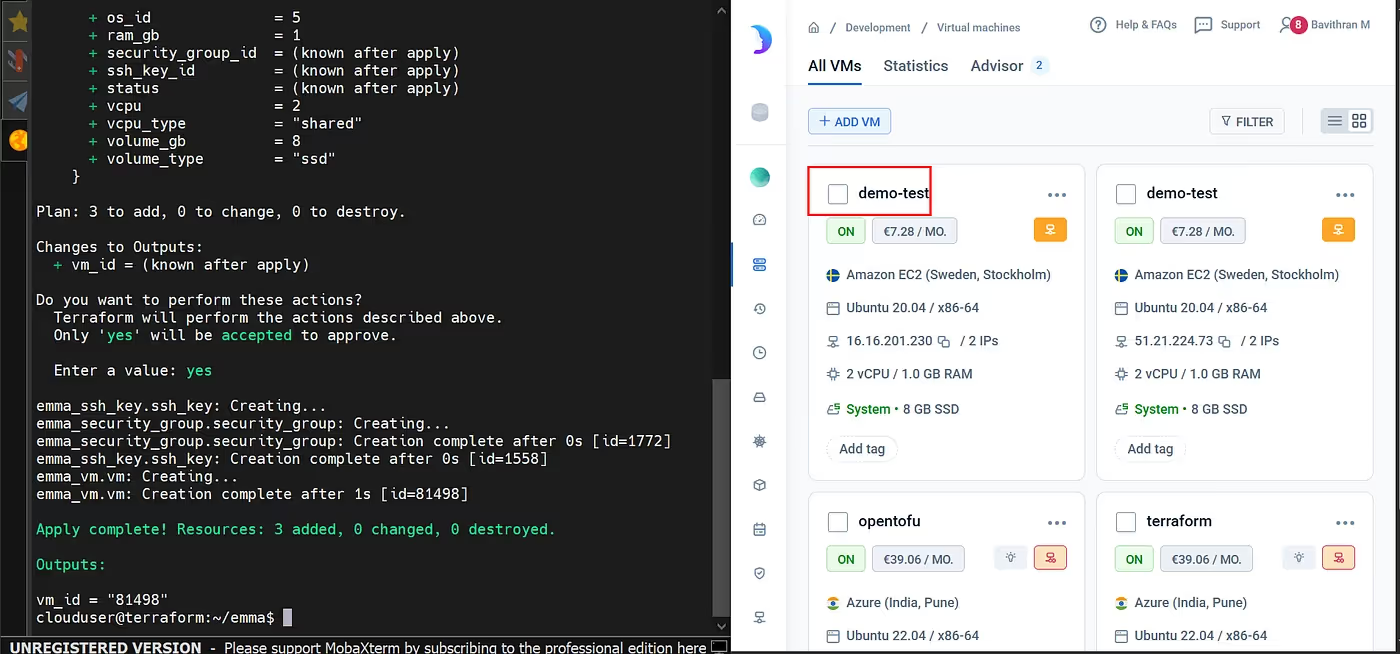
Success!
Your demo test VM is now deployed using Terraform with the emma provider.