August 25, 2025

How To: Deploy Virtual Machines with emma

A Step-by-Step Guide to provision and deploy virtual machines across AWS, Azure, and GCP from a single, unified interface.

Virtual machines (VMs) let you tap into the cloud’s flexible, on-demand compute power and run apps, services, and workloads without managing hardware. Each cloud provider has its own cloud console for deploying VMs, but when you must deploy across multiple regions and providers, switching between different consoles can become a task.

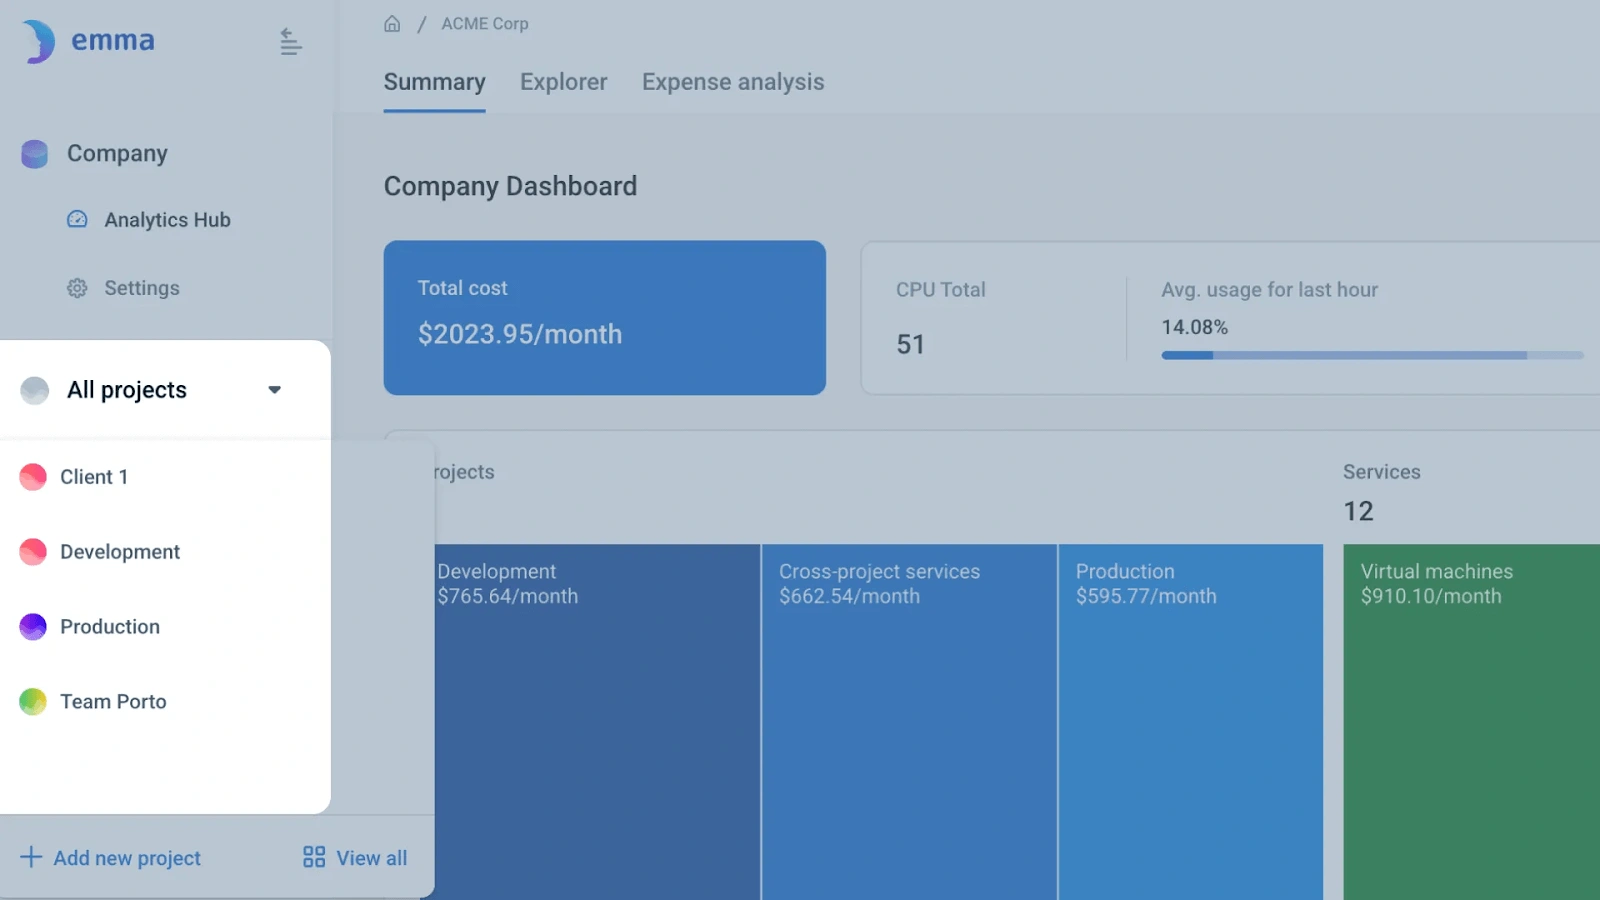
With emma’s intuitive no-code platform, you can deploy production-ready virtual machines across AWS, Azure, GCP, and more — all from a single, unified interface.

Get Started with VM Provisioning in emma

In this step-by-step tutorial, you'll learn how to deploy a cloud-based virtual machine tailored to your workload and budget in AWS, Azure, Google Cloud, VMware, DigitalOcean, OVH Cloud, or Gcore and across multiple regions in just a few clicks.

Step 1: Selecting your project

  1. Start by navigating to All Projects in your emma dashboard.
  1. Choose your project → Go to the Virtual Machines section → Click Add Virtual Machine.
  1. This should take you to the Add Virtual Machine wizard.

Step 2: Customize Your Deployment

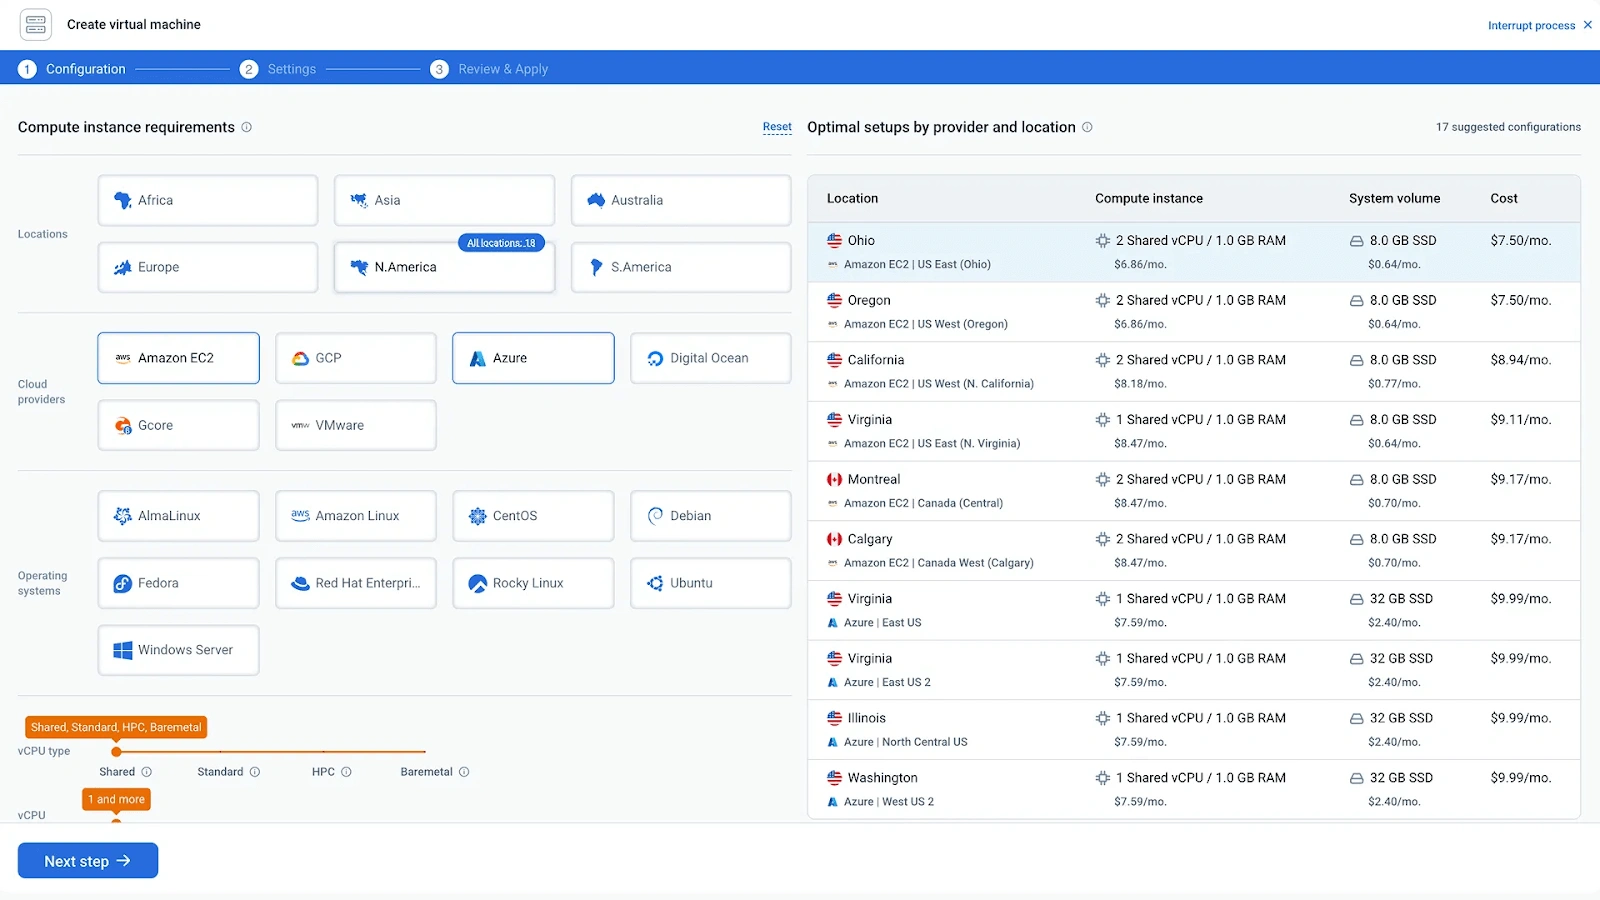
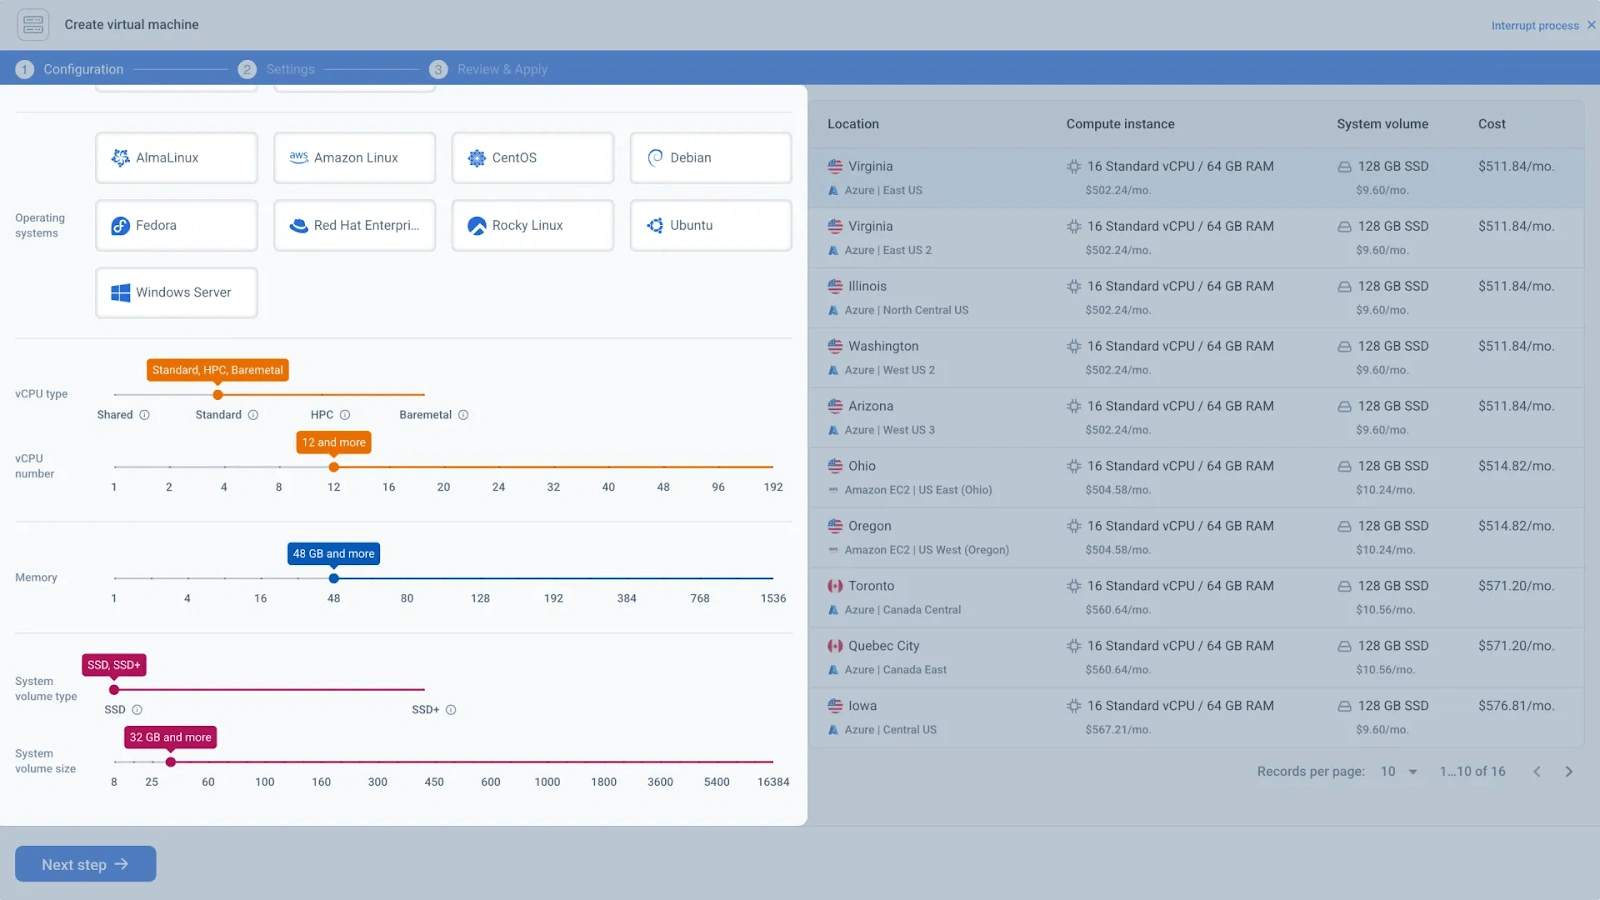
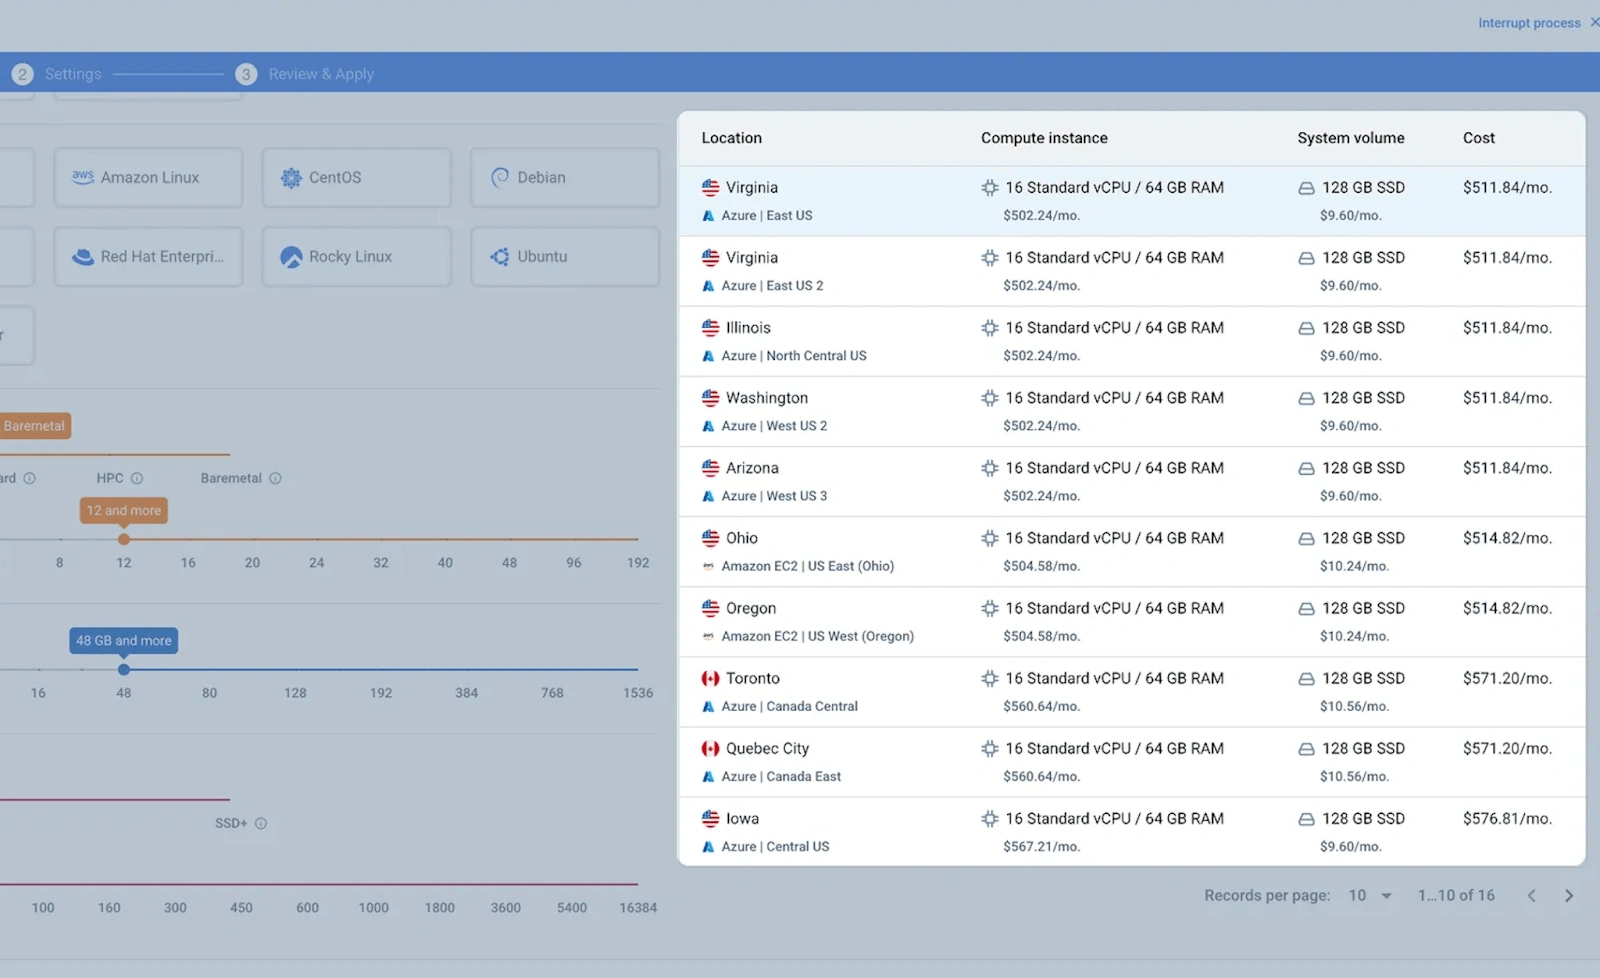
On the left side of the wizard screen, you’ll see filters to tailor your VM deployment:

  • By region
  • By cloud provider
  • By OS
  1. Select one or more regions based on your latency, compliance, and availability requirements.
  2. To create a multi-cloud deployment, simply select multiple providers

Step 3: Configure your VM

  1. Next, define your VM settings:
  • Operating system
  • CPU type and number of cores
  • Memory
  • Storage type (SSD or SSD+)
  • Volume size
  1. On the right side of the wizard, emma shows available configurations ranked by cost and based on your applied filters.
  1. Choose a VM from the results displayed on the right side of the wizard → Hit Next Step.

Step 4: Network and Security Settings

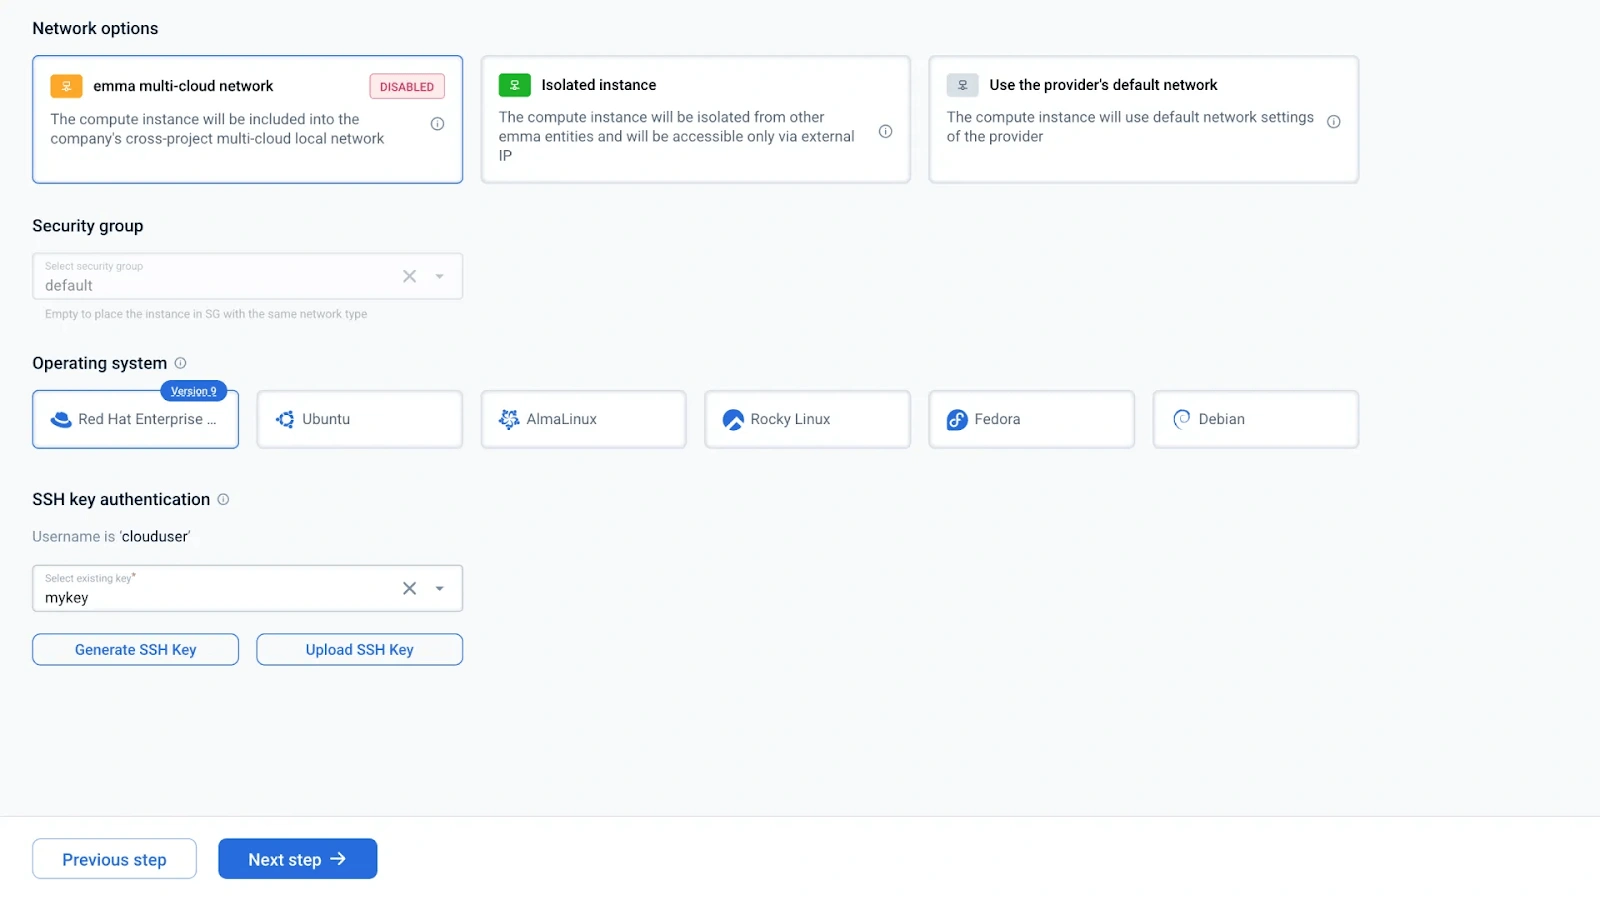
The second screen of the wizard displays network and security settings. Here, you can select the type of network you want your machine to reside in, the security group it should be protected by, and the key it should be accessible by.

  1. Select a network in Network Options.
  2. Select your desired Security group. Unless you have a preference, you can leave the security group empty and the network selection will take care of it.
  3. Add a security key for access and control
  4. Hit Next Step.

Step 5: Deploy Your Virtual Machines

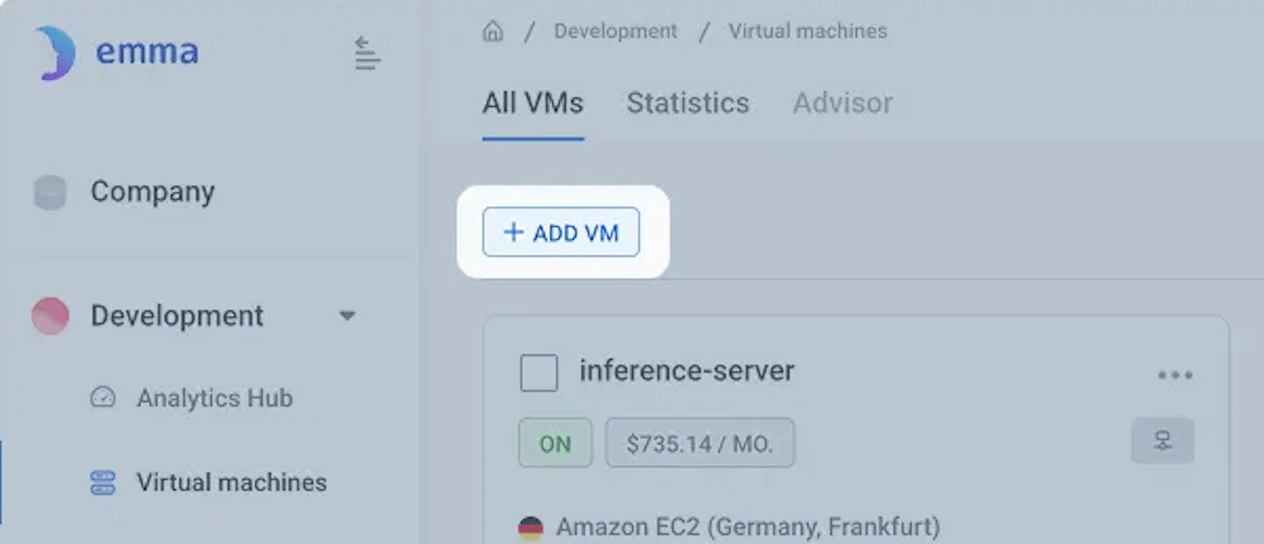
This is the last screen of the Add VM wizard.
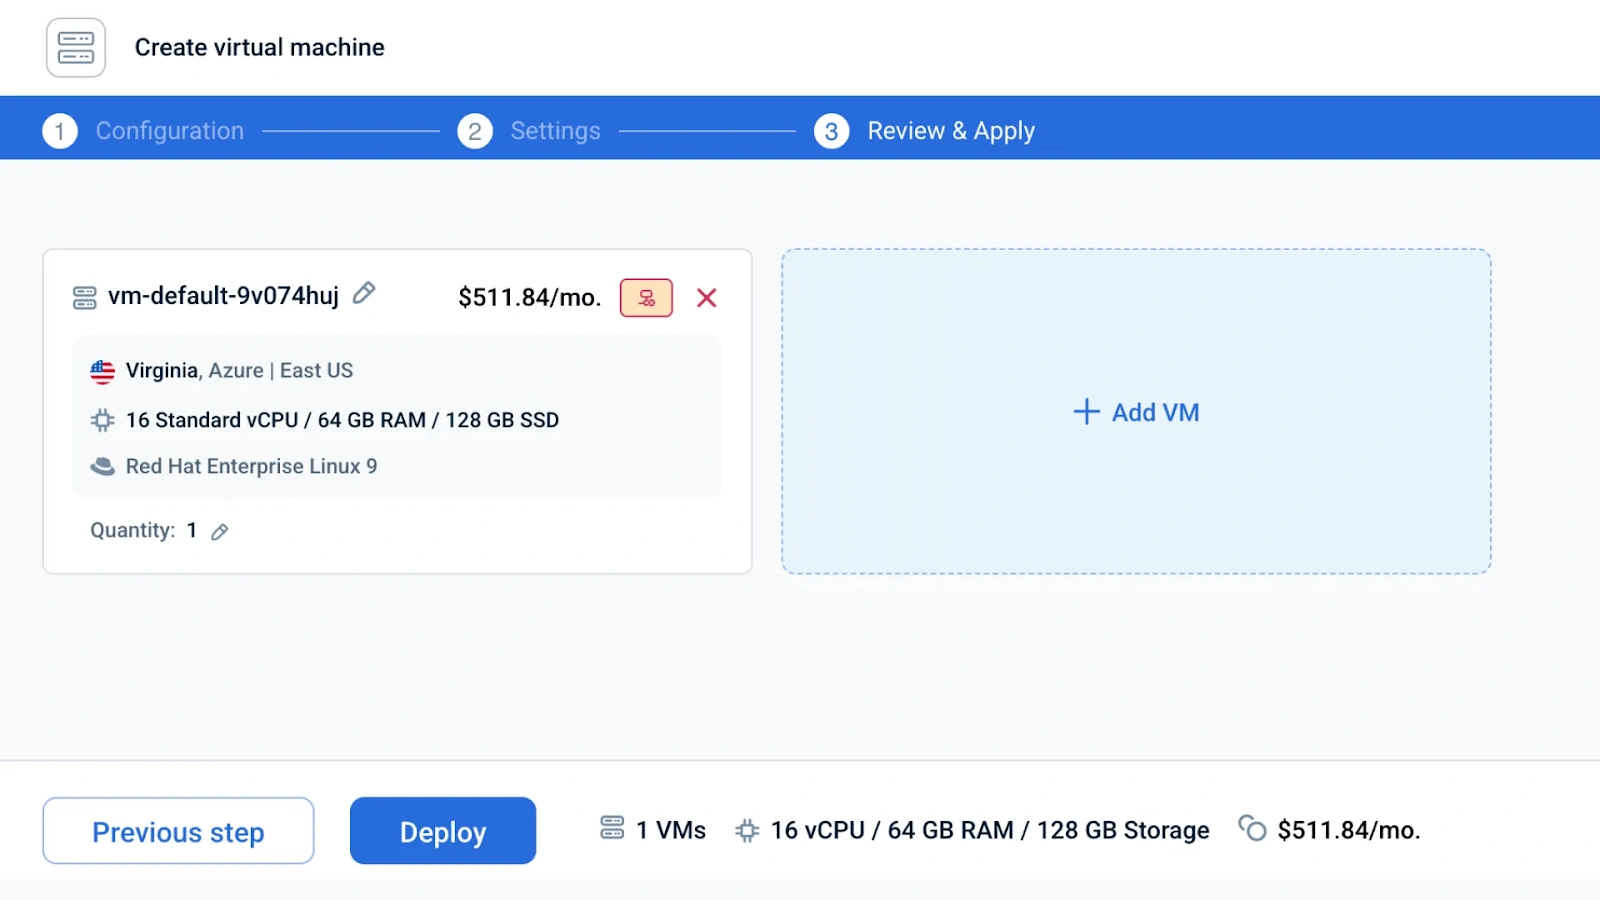
  1. Click  Add VM, and repeat steps 2-4 to configure more virtual machines.

Ready to launch?

  1. Choose the VM instances you want to deploy to production → Click Deploy.

That’s it! Your virtual machines are now live.

Launch VMs Faster, Anywhere

With emma’s no-code deployment, clicks and seconds is all it takes to deploy production-ready virtual machines anywhere — no YAMLs, no tickets, no chaos.

See it in action:

Table of contents
Explore now